
Christmas Cookies with Royal Icing
There is nothing like a batch of freshly baked, buttery Christmas cookies frosted in rich royal icing and dusted with colorful sugar. I can guarantee that you will not find a better, more delicious recipe for cutout sugar cookies anywhere. These festive cookies are favorites of kids and adults alike and are truly a work of art! This year, I decided to do trees, stars, snowflakes, candy canes and reindeer, and I’m thrilled to share with you my recipe for these scrumptious frosted cookies along with a few helpful tips and techniques for frosting the cookies. So, throw on some Christmas carols and get baking!
Christmas Cookies with Royal Icing
Ingredients
Cookies
3 cups white flour
3/4 teaspoon baking powder
1/4 teaspoon salt
1 cup unsalted butter, softened
1 cup granulated sugar
1 egg, beaten
1 tablespoon milk
1/2 teaspoon real vanilla extract
Powdered sugar, for rolling out dough
Cookie cutters
Icing
4 cups powdered sugar
2 tablespoons meringue powder
6 tablespoons water
Green food coloring (or other colors, as desired)
2 12″ disposable pastry bags
2 squeeze bottles
Wilton #3 decorating tip tip or similar
Sanding sugars, for decorating
Sugar pearls, white and/or multi-colored, for decorating ~ this makes for beautiful “decorations” on cookie trees!
Directions
First, make your dough. In a medium bowl, combine dry ingredients (flour, baking powder and salt). Set aside. In an electric mixer, cream butter and sugar until light in color. Add egg and vanilla and beat until combined. With the mixer on low speed, slowly add flour mixture and beat until completely combined. Wrap dough in wax paper and refrigerate for 2 hours or up until overnight.
Preheat oven to 375 degrees.
Line baking sheet with parchment paper.
Roll out dough on surface dusted with powdered sugar until dough is about 1/4″ thick. Alternatively, you can roll out dough on a large piece of parchment paper to prevent sticking- I find this works best for me! Make sure to dust your rolling pin with powdered sugar as well.
Use your favorite Christmas cutters (I used trees, stars, snowflakes, candy canes and reindeer) to cut out cookies. If dough is getting too warm and unmanageable, return it to the refrigerator to re-chill.
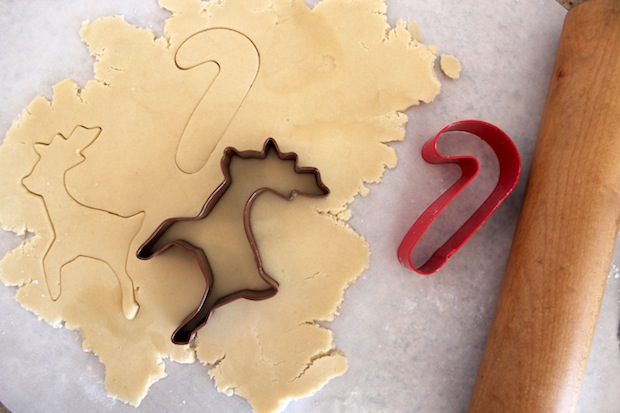
Carefully place cut cookies on parchment paper.

Bake for 6-8 minutes or until just becoming golden on the edges. Be careful not to over-bake!
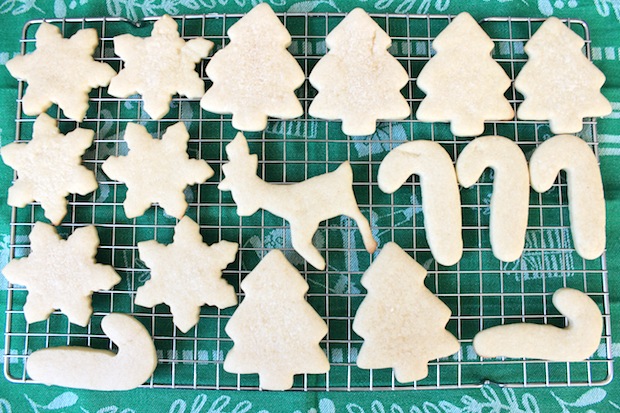
Let cookies stay on baking sheet for 1-2 minutes and then transfer to a cooling rack. Cool completely before icing.
Prepare royal icing.
In an electric mixer, beat meringue powder, powdered sugar and water on low speed for 7-10 minutes or until white and shiny. At this point in the process, you want to be able to pipe the icing easily, so it should be a thicker consistency.
Separate icing into 2 medium bowls if using 2 different colors (I used green and white). Color icing as desired in small bowls. I did a light green color in one bowl and kept the icing in the other bowl white. Cover icing with damp paper towels to prevent drying.
Fill each pastry bag with about 1/4 cup of each of the icings. So, I had one pastry bag filled with green icing and the other with white.
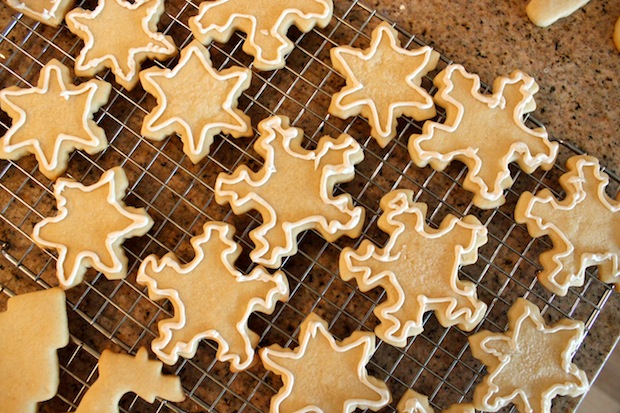
Next, it’s time to pipe the outline of the cookies with the icing. Using your pastry bags fitted with a small round tip (I have found Wilton #3 works well), carefully outline a border around the cookies. Outline the cookies with whatever color you will be using to fill them in with. Make sure the outline is dry and set before moving on to the next step.
Now, it’s time to flood the cookies. Go back to your icing bowls and slowly add enough water to each bowl so the icing has a more liquidy, thinner consistency. I have learned the test is to pick some icing up with a spoon and let it drizzle back into the bowl. The drizzle should disappear into the bowl within 8-10 seconds.
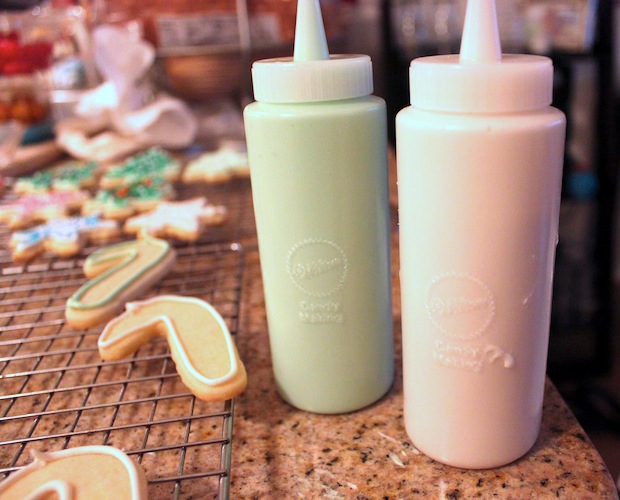
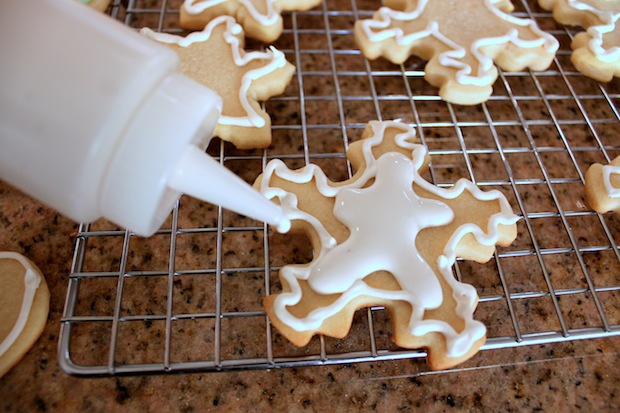
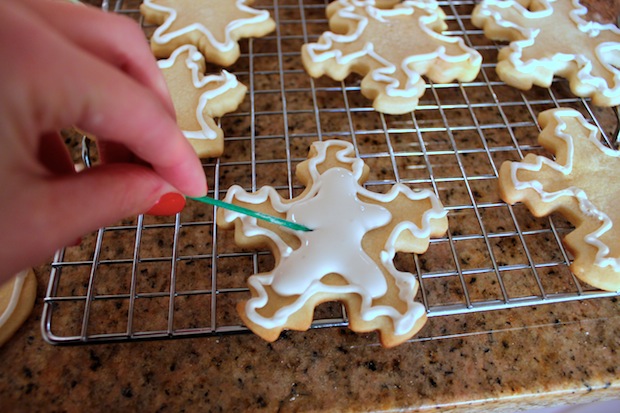
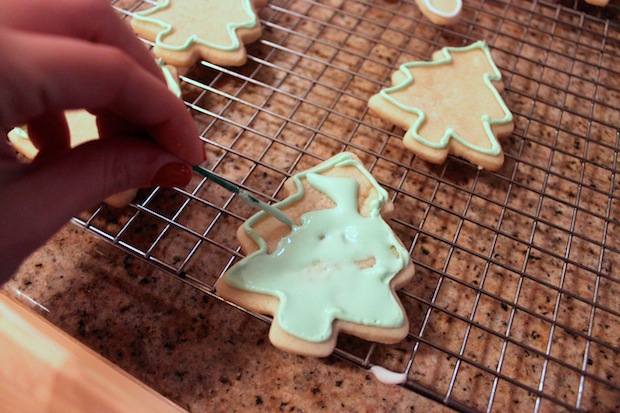
Fill one squeeze bottle with green icing and one with white icing. Next, flood cookies by squeezing icing onto cookies and using a toothpick to spread it out evenly until you reach the outline you piped earlier.
Finally, add sanding sugars, sprinkles and sugar pearls as desired to decorate your cookies. Let dry completely before storing.

- 3 cups white flour
- ¾ teaspoon baking powder
- ¼ teaspoon salt
- 1 cup unsalted butter, softened
- 1 cup granulated sugar
- 1 egg, beaten
- 1 tablespoon milk
- ½ teaspoon real vanilla extract
- Powdered sugar, for rolling out dough
- Cookie cutters
- 4 cups powdered sugar
- 2 tablespoons meringue powder
- 6 tablespoons water
- Green food coloring (or other colors, as desired)
- 2 12″ disposable pastry bags
- 2 squeeze bottles
- Wilton #3 decorating tip tip or similar
- Sanding sugars, for decorating
- Sugar pearls, white and/or multi-colored, for decorating ~ this makes for beautiful “decorations” on cookie trees!
- First, make your dough. In a medium bowl, combine dry ingredients (flour, baking powder and salt). Set aside. In an electric mixer, cream butter and sugar until light in color. Add egg and vanilla and beat until combined. With the mixer on low speed, slowly add flour mixture and beat until completely combined. Wrap dough in wax paper and refrigerate for 2 hours or up until overnight.
- Preheat oven to 375 degrees.
- Line baking sheet with parchment paper.
- Roll out dough on surface dusted with powdered sugar until dough is about ¼″ thick. Alternatively, you can roll out dough on a large piece of parchment paper to prevent sticking- I find this works best for me! Make sure to dust your rolling pin with powdered sugar as well.
- Use your favorite Christmas cutters (I used trees, stars, snowflakes, candy canes and reindeer) to cut out cookies. If dough is getting too warm and unmanageable, return it to the refrigerator to re-chill.
- Carefully place cut cookies on parchment paper.
- Bake for 6-8 minutes or until just becoming golden on the edges. Be careful not to over-bake!
- Let cookies stay on baking sheet for 1-2 minutes and then transfer to a cooling rack. Cool completely before icing.
- Prepare royal icing.
- In an electric mixer, beat meringue powder, powdered sugar and water on low speed for 7-10 minutes or until white and shiny. At this point in the process, you want to be able to pipe the icing easily, so it should be a thicker consistency.
- Separate icing into 2 medium bowls if using 2 different colors (I used green and white). Color icing as desired in small bowls. I did a light green color in one bowl and kept the icing in the other bowl white. Cover icing with damp paper towels to prevent drying.
- Fill each pastry bag with about ¼ cup of each of the icings. So, I had one pastry bag filled with green icing and the other with white.
- Next, it’s time to pipe the outline of the cookies with the icing. Using your pastry bags fitted with a small round tip (I have found Wilton #3 works well), carefully outline a border around the cookies. Outline the cookies with whatever color you will be using to fill them in with. Make sure the outline is dry and set before moving on to the next step.
- Now, it’s time to flood the cookies. Go back to your icing bowls and slowly add enough water to each bowl so the icing has a more liquidy, thinner consistency. I have learned the test is to pick some icing up with a spoon and let it drizzle back into the bowl. The drizzle should disappear into the bowl within 8-10 seconds.
- Fill one squeeze bottle with green icing and one with white icing. Next, flood cookies by squeezing icing onto cookies and using a toothpick to spread it out evenly until you reach the outline you piped earlier.
- Finally, add sanding sugars, sprinkles and sugar pearls as desired to decorate your cookies. Let dry completely before storing.













6 Comments
ciaolinda
These look scrumptious!!!..Absolutely beautiful post!! Love your photos and detailed instructions..!!
Janelle
Thank you! They were so fun to make and going so fast! 🙂
Peggy
These are adorable! Definitely a great addition to a Christmas cookie tray =)
Janelle
Thank you!! Yes, so festive! 🙂
Marisa Espinosa
Hi Janelle!
I planned to make these with my 3 year old today (knowing that guarantees they won’t come out as pretty as yours! 🙂 ). I just realized I only have salted butter, not unsalted. What do you think? Would that work okay??
Janelle
Hi Marisa! How fun, I’m sure they will come out spectacular! I think it will be fine to use salted butter ~ I would just omit the 1/4 teaspoon of salt in the recipe since the butter will take care of that. It shouldn’t be a problem at all. Let me know how it comes out! 🙂